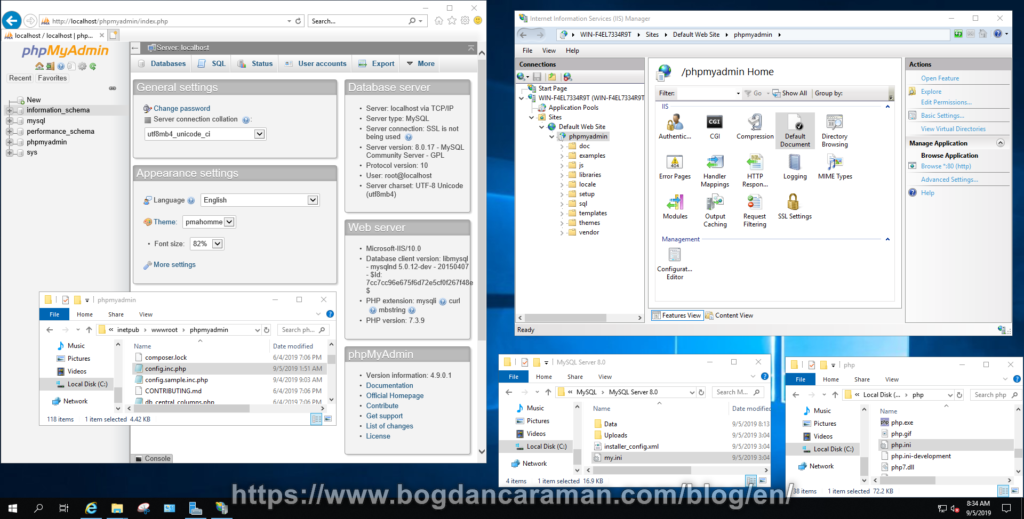
phpMyAdmin is a free and open-source database management system for MySQL and MariaDB. As a portable web application written primarily in PHP, it has become one of the most popular MySQL administration tools, especially for web hosting services. Through phpMyAdmin, you can perform various operations, such as:
- create, modify, or delete databases;
- performs SQL (Structured Query Language);
- exports the databases from the current server;
- imports the uncompressed .sql or compressed .sql.zip databases into the current server.
Please disregard the old software versions in this article; they remain examples, so I recommend you always download the new ones.
Currently, phpMyAdmin is available in 72 languages and can be downloaded from https://www.phpmyadmin.net/downloads/ as phpMyAdmin-xxxx-all-languages.zip where xxxx is the latest version available (eg 5.2.1). phpMyAdmin will be installed in our example on a Windows Server 2019 Standard Evaluation (Desktop Experience) operating system with IIS (Internet Information Services), CGI (Common Gateway Interface), Microsoft Visual C++ Redistributable Package, PHP, and MySQL.
You can follow How to install MySQL on Windows Server and How to install PHP on Windows Server to install those if they are not already installed on your system, otherwise, the phpMyAdmin will not run correctly. For the article “How to install MySQL on Windows Server” we can add an extra note about the Authentication Method step:
- Use Strong Password Encryption for Authentication (RECOMMENDED); only if you want phpMyAdmin to use “caching_sha2_password“. For this, you need to read about that from Authentication Plugins and Caching SHA-2 Pluggable Authentication;
- Use Legacy Authentication Method (Retain MySQL x.x… Compatibility) it is my choice for this demonstration to use Native Pluggable Authentication (mysql_native_password).
This default_authentication_plugin=mysql_native_password or default_authentication_plugin=caching_sha2_password can be discovered from C:\ProgramData\MySQL\MySQL Server 8.0\my.ini when the installation of the MySQL is completed.
If you want to reinstall the MySQL go to the Control Panel\All Control Panel Items\Programs and Features, choose Uninstall, then manually delete the folder C:\ProgramData\MySQL. Then, you can start again the installation and choose Legacy for Authentication Method.
After all these steps have been followed, we can continue to install phpMyAdmin:
- Right-click on the phpMyAdmin-x.x.x.x-all-languages.zip file, select 7-Zip and as Destination, we choose Extract to… “phpMyAdmin-x.x.x.x-all-languages\“. After the extraction is complete, rename the phpMyAdmin-x.x.x.x-all-languages folder with phpmyadmin and where you copy it to C:\inetpub\wwwroot \; If you use Extract All instead of 7-Zip you should know that after extracting, 2 folders will be created, the second one should be renamed and copied to C:\inetpub\wwwroot\;
- Open Internet Information Services (ISS) Manager through Start\Windows Administrative Tools or Server Manager\Tools\Internet Information Services (ISS) Manager and expand the Default Web Site and find phpmyadmin to right-click on it and Convert to Application;
- In the Add Application window, leave the default settings and click OK;
- Create C:\temp\phpsessions folder for PHP sessions to be saved there. The session is a global registry in which user identity data is recorded. To the temp and phpsessions folders will give full rights by right-clicking, Properties, Security, Users then Edit and next to Full control tick Allow;
- Edit the php.ini file with Notepad or Notepad++ from C:\php\ and search with Ctrl+F the next code line:
;session.save_path = "/tmp" change with session.save_path = "C:\temp\phpsessions"
If we are still here, please check the extensions below to be uncommented, without “;” for automatic upload:
extension=php_bz2extension=curlextension=gd2extension=mysqliextension=mbstringMore requirements can be found at https://docs.phpmyadmin.net/en/latest/require.html
Depending on the PHP applications, other extensions can be opened upon request. We will open them at the right time. Ctrl+S to save the changes from php.ini;
- To restart IIS open the Comand Prompt or PowerShell and type iisreset
C:\Users\Administrator>iisreset
Attempting stop…
Internet services successfully stopped
Attempting start…
Internet services successfully restarted
- From IIS Manager expand again the Default Web Site to phpmyadmin. On the right window see the Default Document and double-click on that, we search for index.php, select it, and Move up to appear first in the respective list; If index.php doesn’t already exist, select Actions\Add and at Name: write index.php
- At C:\inetpub\wwwroot\phpmyadmin we are looking to edit config.sample.inc.php file which at the end will be saved as config.inc.php via Ctrl+Alt+S or File\Save As...
Search for
$cfg['blowfish_secret'] = ''; /* YOU MUST FILL IN THIS FOR COOKIE AUTH! */
here will add a strong password of up to 32 characters
$cfg['blowfish_secret'] = 'strongpassword-1'; /* YOU MUST FILL IN THIS FOR COOKIE AUTH! */
- The following code lines will be modified
// $cfg['Servers'][$i]['controluser'] = 'pma';// $cfg['Servers'][$i]['controlpass'] = 'pmapass';
the line codes will be uncommented (without “//”) and the pmapass will be changed to strongpassword-2
$cfg['Servers'][$i]['controluser'] = 'pma';

$cfg['Servers'][$i]['controlpass'] = 'strongpassword-2';
- The next uncomment lines of code will be those from
/ * Storage database and tables * /
namely
$cfg['Servers'][$i]['pmadb'] = 'phpmyadmin';$cfg['Servers'][$i]['bookmarktable'] = 'pma__bookmark';$cfg['Servers'][$i]['relation'] = 'pma__relation';$cfg['Servers'][$i]['table_info'] = 'pma__table_info';$cfg['Servers'][$i]['table_coords'] = 'pma__table_coords';$cfg['Servers'][$i]['pdf_pages'] = 'pma__pdf_pages';$cfg['Servers'][$i]['column_info'] = 'pma__column_info';$cfg['Servers'][$i]['history'] = 'pma__history';$cfg['Servers'][$i]['table_uiprefs'] = 'pma__table_uiprefs';// $cfg['Servers'][$i]['tracking'] = 'pma__tracking';// $cfg['Servers'][$i]['userconfig'] = 'pma__userconfig';// $cfg['Servers'][$i]['recent'] = 'pma__recent';// $cfg['Servers'][$i]['favorite'] = 'pma__favorite';// $cfg['Servers'][$i]['users'] = 'pma__users';// $cfg['Servers'][$i]['usergroups'] = 'pma__usergroups';// $cfg['Servers'][$i]['navigationhiding'] = 'pma__navigationhiding';// $cfg['Servers'][$i]['savedsearches'] = 'pma__savedsearches';// $cfg['Servers'][$i]['central_columns'] = 'pma__central_columns';// $cfg['Servers'][$i]['designer_settings'] = 'pma__designer_settings';// $cfg['Servers'][$i]['export_templates'] = 'pma__export_templates';
then save the file via Save As (Ctrl+Alt+S) with the name config.inc.php in C:\inetpub\wwwroot\phpmyadmin
- Type in the default browser the following address: http: //localhost/phpmyadmin/index.php and will Log in with the root username and the password from MySQL installation.
You can find the latest version of phpMyAdmin at https://www.phpmyadmin.net through the Download menu.